
How to Block Emails on Outlook Simplified
Some senders just won’t take the hint. You’ve deleted the same newsletter ten times, and it’s back again tomorrow morning, sitting at the top of your inbox like nothing happened.
The fastest fix takes about ten seconds: right-click the message, hit Block, then Block Sender. Done.
That’s the short answer, though. It only works if you’re in the right version of Outlook, and only if blocking is the right tool for what’s actually bothering you, because oftentimes, it isn’t. Below we’ll go over how to block emails on Outlook across every version Microsoft currently ships, what to do when the Block button is missing, and when you re-strategize entirely.
First, work out which Outlook you’re using
Microsoft currently ships five different Outlook experiences, and the steps on how to block emails on Outlook changes depending on which one you’ve got open. That’s why so many step-by-step guides don’t match what’s on your screen.
| Version | How to tell | Where blocking lives |
|---|---|---|
| New Outlook for Windows | “New Outlook” toggle in the top-right corner, switched on | Right-click → Block, or Settings → Mail → Junk email |
| Classic Outlook (2016, 2019, Microsoft 365) | Traditional ribbon with File, Home, Send/Receive tabs | Home → Junk → Block Sender |
| Outlook on the web | You’re in a browser at outlook.com or outlook.office.com | Right-click → Block, or Settings → Mail → Junk email |
| Outlook for Mac | Mac menu bar at the top of the screen | Message → Junk Mail → Block Sender |
| Outlook mobile app | iOS or Android | Open message → three dots → Block |
One more thing matters as much as the app itself: your account type. A Microsoft account (Outlook.com, Hotmail, Live, or a Microsoft 365 work account) gets the full set of junk controls.
An IMAP or POP account added to Outlook, like a Gmail address or a custom domain through a third-party host, often doesn’t. More on that shortly, because it’s the single most common reason blocking “doesn’t work.”
How to block emails on Outlook in 30 seconds
For new Outlook and Outlook on the web, which now share almost identical interfaces:
- Find any message from the sender you want to block
- Right-click it in the message list
- Select Block from the menu
- Choose Block Sender, then confirm
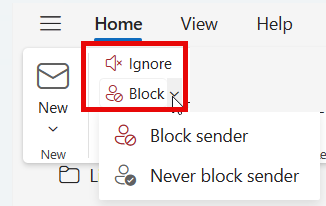
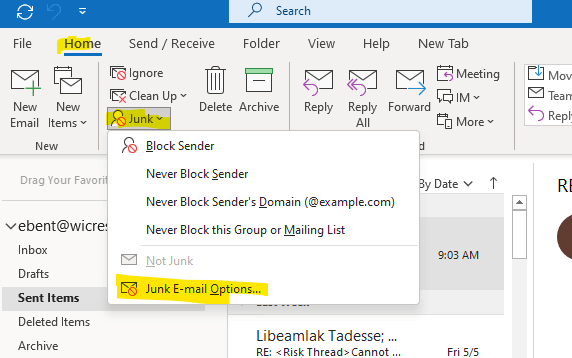
In classic Outlook it sits on the ribbon instead: select the message, then go to Home → Junk → Block Sender.
Blocking does less than the name suggests, and that’s worth understanding before you start using it. Outlook doesn’t stop the sender from emailing you. Their messages still arrive, still hit your mailbox, and still count against your storage. They just get routed into the spam folder, labelled Junk Email in Outlook, instead of your inbox. At the same time the sender gets no bounce and no notification.
What happens next is the part that catches people off guard. Microsoft automatically deletes anything sitting in the Junk Email folder after 14 days, and once it’s gone, it’s gone for good.
So that goes both ways, as in if you block a client’s domain by accident, you may not notice until the invoice you never received is two weeks past due.
How to block an email address (or a whole domain) from Settings
Right-clicking works fine for one-offs, but it has an obvious limitation: you need a message from that sender sitting in front of you. The settings route doesn’t.
In new Outlook or Outlook on the web, go to Settings → Mail → Junk email. You’ll see two boxes:
- Blocked senders and domains → type the address, click Add, then Save
- Safe senders and domains → the opposite list, for anything the filter keeps wrongly flagging
In classic Outlook, the equivalent lives under Home → Junk → Junk E-mail Options → Blocked Senders.
This is also the only place you can do the genuinely useful version: blocking the whole domain instead of a single address. Add @example.com rather than [email protected] and every address behind that domain goes to junk in one entry. For a company that keeps rotating its sending addresses, that’s the difference between blocking once and blocking forever.
There are limits, and they’re lower than most people expect. Microsoft’s documentation puts the cap at 1,024 entries across your Blocked Senders and two Safe lists combined on Exchange Server accounts, rising to around 10,000 on newer Outlook versions.
Hit the ceiling and Outlook simply refuses to add anything new. Microsoft’s own advice at that point is to switch to blocking domains, since one domain entry does the work of fifty single addresses.
How to block emails on Outlook app (iOS and Android)
The steps on mobile are short and simple. Open the message, tap the three dots in the top-right corner, and select Block. On older builds you may see Move to Junk instead, which does the same job but doesn’t add a permanent entry to your list.
For Microsoft accounts, the block gets written server-side, so it syncs to your desktop, your browser, and every other device signed into that mailbox within seconds.
The exception, again, is third-party accounts. Add a Gmail or IMAP address to the Outlook app and the Block option frequently doesn’t appear at all, because there’s no server-side junk list for Outlook to write to. If that’s your situation, open Outlook on the web, even if it’s in your phone’s browser, and manage things there instead.
Why the Block option is missing or greyed out
This is easily the most-asked question on Microsoft’s own Q\&A forums, yet almost no guide covers it.
In the new Outlook for Windows, there is no Settings → Mail → Junk email section at all if the only accounts you’ve added are IMAP, POP, or non-Microsoft. Add even one personal or business Microsoft account and the section appears.
Select the IMAP account inside it, though, and Outlook returns a flat “Junk email settings are not supported for the selected account.” It isn’t a bug and there’s no setting to flip. Junk filtering happens on Microsoft’s servers, and your Gmail or third-party mail never touches them.
Three ways around it, in order of how much I’d recommend them:
- Use Outlook on the web → blocked senders and Safe senders both work there for Microsoft accounts, and the list syncs straight back to your desktop app.
- Block it at the source instead → if it’s a Gmail address running through Outlook, block the sender inside Gmail. That’s where the filtering actually happens.
- Write a rule → rules are client-side, always available regardless of account type, and more flexible than blocking anyway. In classic Outlook: Home → Rules → Manage Rules & Alerts → New Rule, then move anything from that sender straight to Deleted Items. No junk list required.
Blocking vs junk vs unsubscribe vs rules: how to stop spam emails properly
Blocking is the tool everyone reaches for first, and for actual spam it’s close to useless. Real spam-operating individuals and companies rotate their sending addresses constantly. So you block one, they send from another, just with an extra letter or number. Kaspersky’s 2025 figures, replicated in Statista’s long-running spam series, put spam at 44.99% of all global email traffic.
No hand-maintained blocklist keeps can keep up the pace with that. So match the tool to the problem:
| What you’re dealing with | Use this | Why |
|---|---|---|
| Phishing or obvious spam | Report → Junk (or Report → Phishing) | Feeds Microsoft’s global filter, not just your personal list |
| Marketing you once signed up for | Unsubscribe | Blocking leaves you on their list as a silent contact, so they keep sending |
| One specific person or company | Block sender or domain | Permanent, syncs everywhere, and exactly what the feature is for |
| Newsletters you want out of the inbox but not deleted | Rule, or Sweep in Outlook on the web | Files them into a folder you check when you feel like it |
| A filter that’s too aggressive or too lax | Junk E-mail Options → filter level | Classic Outlook lets you dial the whole filter up or down |
The short version is to report the criminal stuff, unsubscribe from the legitimate stuff, and save blocking for the handful of senders who deserve a permanent entry on the list.
What blocking looks like from the sender’s side
Everything above assumes you’re the one pressing the button, but flip it around for a second. If you send mass emails for a living, whether that’s cold outreach, recruiting, or newsletters, someone is pressing that button at you.
And it costs more than one lost contact. Blocks and “Report junk” clicks are negative engagement signals attached to your domain reputation and your sending IP, and Microsoft aggregates them.
Once enough recipients tell Microsoft your mail is unwanted, it stops asking and starts making the decision on its own, routing you to junk by default for people who never complained about anything.
Microsoft makes that decision about a domain it can identify, and the identity it attaches history to is the DKIM signature — an unsigned domain, or one still signing with a short key, gives it nothing good to hang on to. Worth confirming your selector is actually publishing a key of a sane length before assuming the problem is the recipients:
Free DKIM Record Checker
Find and validate the DKIM keys on any domain — including the real key size, revoked keys, and testing flags left switched on. Leave the selector blank and we’ll scan the common ones for you.
What is DKIM, and what’s a selector?
DKIM puts a cryptographic signature on every message you send. Receivers fetch your public key from DNS and verify it, which proves the message really came from your domain and wasn’t altered in transit.
- The selector is the name of the key. A domain can have many keys — one per sending tool — so each gets a label. The public key lives at
<selector>._domainkey.yourdomain.com. - Selectors are arbitrary. There’s no way to list them from DNS, which is why every DKIM checker either asks you for one or guesses from a dictionary of provider defaults. We do both.
- Your selector is in every message you send — the
s=value in theDKIM-Signatureheader. - DKIM survives forwarding; SPF doesn’t. That’s why DMARC needs at least one of them aligned, and why DKIM is the more robust of the two.
Lookups run from your browser via Cloudflare’s public DNS-over-HTTPS resolver. Nothing is logged or stored by this tool.
How to find your selector in 30 seconds
- Send an email from the domain to a Gmail address.
- Open it and choose ⋮ → Show original.
- Find the
DKIM-Signature:header. - The
s=value is your selector;d=is the signing domain.
In Outlook it’s File → Properties → Internet headers. If a message carries several DKIM-Signature headers, you have several keys signing it — check each selector separately.
Common DKIM problems and what they mean
- Empty
p=. The key has been revoked. Every signature made with that selector now fails — usually a rotation that was only half-finished. t=yleft on. Testing mode tells receivers to ignore DKIM failures. It’s meant for the first days of a rollout, and it quietly cancels the protection you think you have.- 1024-bit keys. They still verify, but they’re below current guidance. Rotate to 2048-bit when your provider offers it.
- Two TXT records on one selector. Verifiers pick one, and it may be the wrong one — signatures then fail intermittently, which is brutal to debug. Delete the stale record.
- Key truncated in DNS. A 2048-bit key is longer than the 255-character limit for a single DNS string, so it must be split into several quoted chunks. Most DNS hosts handle it; some silently cut the key off.
The bar also moved recently. Since 5 May 2025, Microsoft requires SPF, DKIM and DMARC (p=none at minimum, with proper alignment) from anyone sending more than 5,000 messages a day to Outlook.com, Hotmail.com, or Live.com. Fail those checks and your mail gets rejected outright with a 550 5.7.15 Access denied, no junk folder involved. Nobody sees it, including you, unless you’re reading your bounce logs.
The solution: Email warm-up
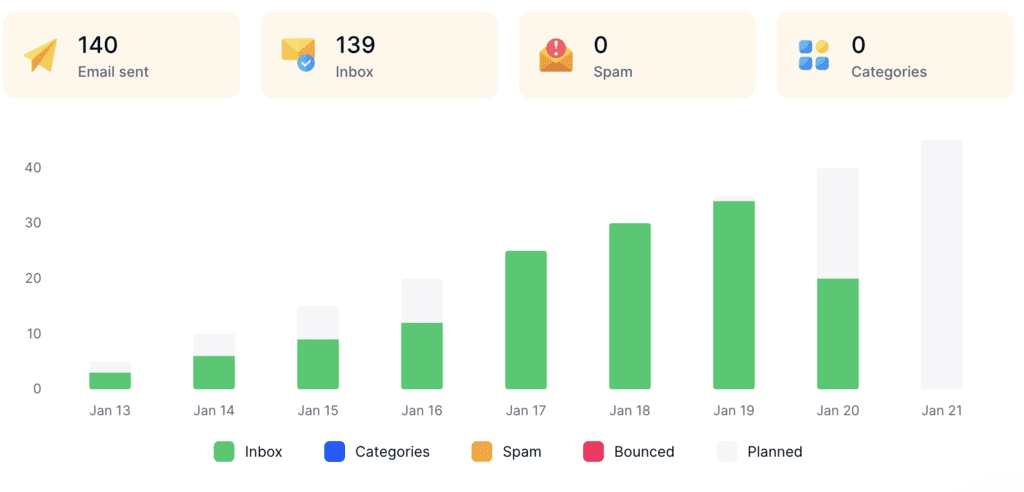
This is where email warm-up earns its place in the stack. Instead of a new domain going from zero to 300 sends a day and tripping every filter Microsoft has, you build a history of real, gradual, and positive engagement first, then keep building it while you scale.
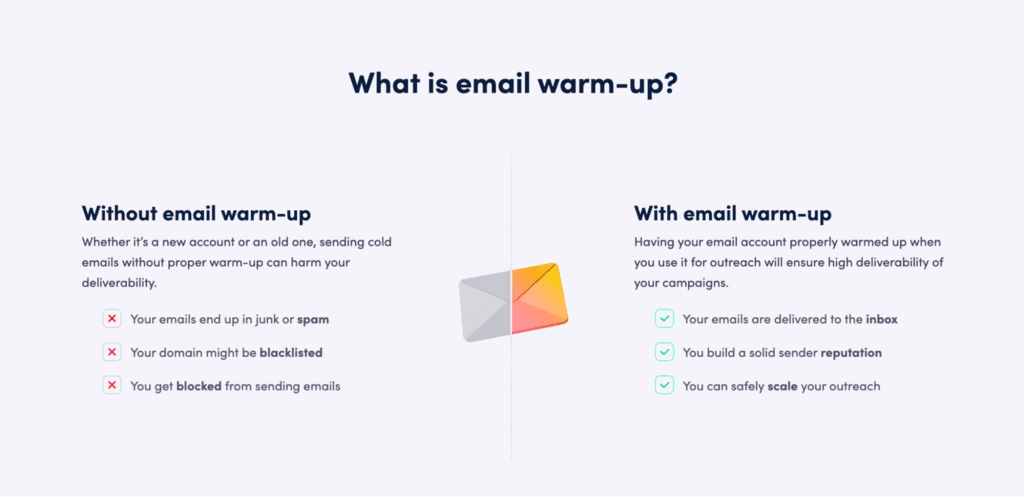
That’s exactly what MailToaster does. You connect your email account (Outlook, Gmail, or another provider, no switching required) and pick a profile: New Email Account to build your sender reputation from scratch, or Reputation Protect to maintain and repair an existing one.
From there, it runs on its own through a peer-to-peer network of real inboxes, with no free or temporary accounts involved. Those inboxes open your emails, reply, mark them as important, and pull them out of spam when they land there, which is exactly what shows Microsoft that your email address is legitimate.
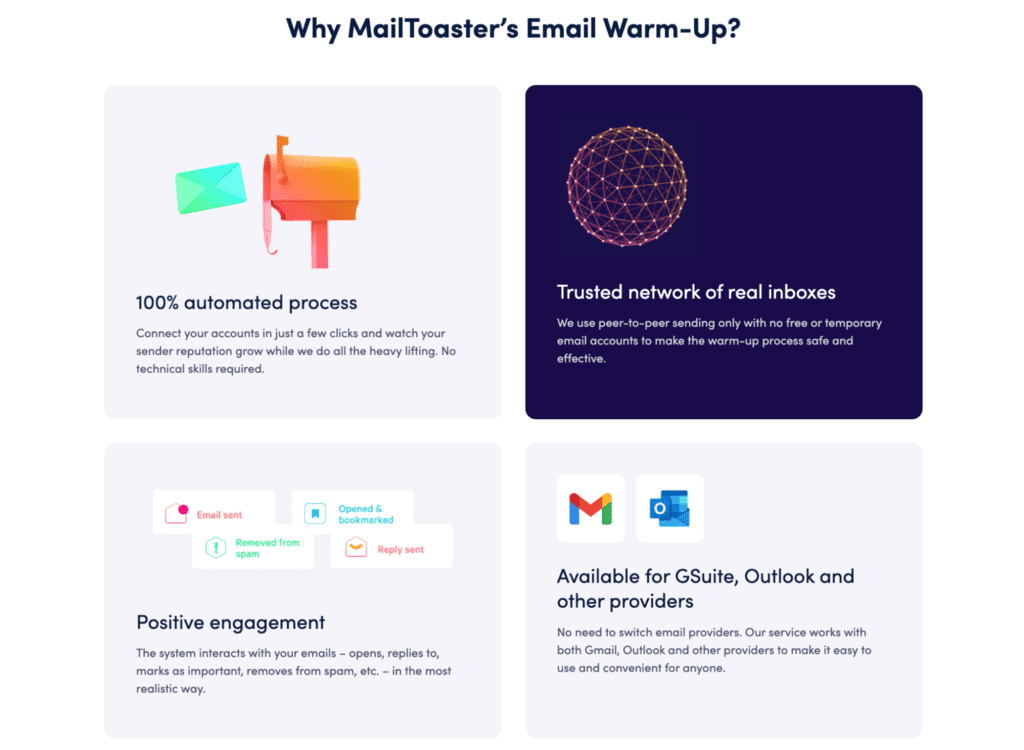
It also checks your SPF, DKIM and DMARC records automatically, the same three things Microsoft now demands from bulk senders, and reports how much of your mail is reaching the inbox versus spam, so inbox placement stops being guesswork.
Plans start at just $29 per account per month with a 7-day free trial — check it out!
How to unblock a sender in Microsoft Outlook
Everything above covers how to block emails in Microsoft Outlook. Unblocking runs through the same menus in reverse, and takes about a minute in total.
- In new Outlook or on the web: Settings → Mail → Junk email, find the address under Blocked senders and domains, click the bin icon, then Save.
- In classic Outlook: Home → Junk → Junk E-mail Options → Blocked Senders → Remove.
Do one extra step while you’re at it. Add that address to Safe senders as well, otherwise the junk filter can flag it again on its own reasoning, and you’ll be back in the same menu next week.
Wrapping up
Blocking is a precision tool, not a spam filter. Use it for the specific people and domains you never want to hear from again, unsubscribe from the marketing you actually opted into, report the phishing so Microsoft’s filter learns from it, and let rules handle everything in between. Then check your blocked list every few months or so. Old entries sometimes have a habit of quietly eating mail you’d rather have.
If you’re on the sending side of that button, the same logic runs in reverse: sender reputation gets built before you need it. Warm up your inbox with MailToaster with your 7-day free trial.
FAQ
Does someone know when you block them on Outlook?
No. There’s no notification and no bounce message. From the sender’s side the email looks like it was delivered normally, and they simply never get a reply.
Does blocking a sender delete emails already in my inbox?
No. Blocking only affects mail that arrives after you set it up. Anything already sitting in your inbox stays exactly where it is until you delete it yourself.
Why do I still get emails from a sender I blocked?
Usually because they’re sending from a slightly different address, or because the block was applied to a display name rather than the actual address. Check the real sender address in the message header and block the domain instead.
Is blocking the same as marking an email as junk?
Not quite. Marking as junk moves that message and teaches Microsoft’s filter. Blocking adds a permanent rule for all future mail from that sender. Reporting junk helps everyone; blocking helps only you.
How do I block emails on Outlook for Mac?
Open the message, then go to Message → Junk Mail → Block Sender in the menu bar. For a Microsoft account it syncs to your other devices the same way the Windows and mobile versions do.
How many senders can I block in Outlook?
Between 1,024 and roughly 10,000 entries depending on your account and Outlook version, counting your Safe lists too. Block domains rather than individual addresses and you’ll never come close.
Can I block emails on Outlook without opening the message?
Yes. Right-clicking a message in the list is enough, and you can add addresses under Settings → Mail → Junk email without ever having received mail from them.